What's The Deal With SvelteKit 2?
| Published: January 06, 2024
| Updated: February 03, 2024
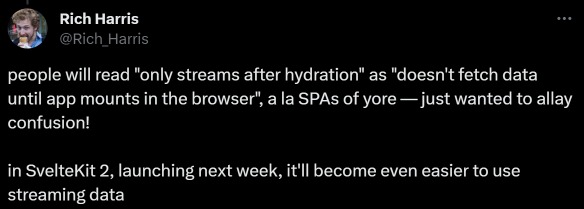
SvelteKit 2 was released on the 14th December 2023, which was somewhat of a surprise to the common Svelte developer. With minimal hype leading up to the launch, a simple post reply from Svelte’s creator Rich Harris on X sent Reddit into theorizing.

The Tweet from Rich Harris mentioning the release of SvelteKit 2
The people began to speculate on which features SvelteKit 2 would bring. Many citing some of the popular discussion points on GitHub.
This article will discuss the main changes of Sveltekit v2 and how to implement some of the new features. We’ll also mention some of the features the Sveltekit community has been longing for that didn’t make it into the release. 👀
What’s new in SvelteKit 2
In all honesty, SvelteKit 2 brought few major changes to the table over it’s predecessor. There are a couple breaking API changes, but the way you develop an app with SvelteKit hasn’t changed.
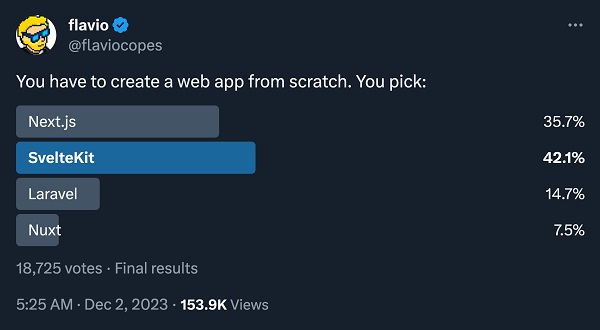
The official release statement from the Svelte team only mentions 1 new feature, and then talks about other community efforts and a poll.

In the SvelteKit 2 Migration guide, we go far more in depth about some of the main changes in SvelteKit v2, so we’ll get to them.
But first, let’s talk about the big new feature first in the main announcement.
Shallow Routing
Shallow routing is a fairly advanced feature that allows the user to create history entries without navigating. In other words, we can decouple page renders from navigation.
Perhaps understanding this theoretically is rather useless without going through some of the use cases, and how it works to improve UX.
When we decouple the URL from the location history, we can do all sorts of things in the app without having to change the page we’re on. And more to that, we can ‘artificially’ create history events which the user can navigate back and forward to using their browser’s buttons.
The pushState Function
The most common example used to explain this is the idea of pushing a history event when a modal is opened on the page.
The page (URL) remains the same, however there is a clear distinction where the user perceives something new. Now, if the user presses back it will remain on the same page, however the modal will disappear. Traditionally, this would have taken the client back to the previous url, rather than the previous ‘state’ of the same page.
Pulling off this example is easy-peasy.
First, import pushState from the $app/navigation:
import { pushState } from '$app/navigation';Then whenever you want to add a history event, call pushState(relativeUrl, newPageState), where realtiveUrl is the URL to push to the history events ("" to stay on current page), and newPageState is an object where you can modify page store variables.
function showModal() {
    pushState('', {
        showModal: true
    });
}
So, the example used in the SvelteKit official docs is:
<script lang="ts">
    import { pushState } from '$app/navigation';
    import { page } from '$app/stores';
    import Modal from './Modal.svelte';

    function showModal() {
        pushState('', {
            showModal: true,
        });
    }
</script>

{#if $page.state.showModal}
    <Modal close={() => history.back()} />
{/if}
Which means that to close the modal, we just go back one step in the browser history entries.
The replaceState Function
If we want to replace the current page (URL) without creating a history entry, we would use the replaceState function. With pushState, we’re artificially creating a history event, and with replaceState, we’re artificially removing a history event.
This means that if you were on website.com/page-1 and clicked to enter website.com/page-2, where some button clicked called a replaceState to take you to website.com/page-3, and you clicked back once - it would take you to the originial website.com/page-1.
Effectively removing the website.com/page-2 history entry when you called relaceState('page-2').
To visualize this, we’re doing this:
page-1 -> (click) -> page-2 -> (click) -> page-3 -> (go back) -> page-1
Inside your Svelte markup, use replaceState shallow routing in your anchor tags by adding the data-sveltekit-replacestate attribute, like this:
<a data-sveltekit-replacestate href="/path">Path</a>
More Use Cases for Shallow Routing
Pop-up views
Pop-up views allow you to render entirely new routes inside of a current page without needing to navigate or change the URL.
For example, you can open up a modal on a page, and render another page inside of that modal, without changing creating any history events… Or if you did want to change the history to include that, then you can! All whilst keeping the original page as the backdrop.
Huntabyte has a nice short video walking you through the code to perform a more complex function like this:
I wrote an extensive article on Shallow Routing if you’d like to learn more about it!
No Need to throw
In SvelteKit v2, you don’t need to throw for your SveletKit redirect and error functions.
Traditionally, if you needed to redirect a user from the server, you would have to throw it:
async function checkIfLoggedIn(event) {
    const session = await event.locals.auth.validateSession();
    if (!session) {
        throw redirect(401, '/login');
    }
    return session
}
In SvelteKit v2, you can remove the keyword throw and call the function directly, so for the example above, redirect(401, '/login') is sufficient:
    if (!session) {
        redirect(401, '/login');
    }
The same applies for errors.
Perhaps you have an error, and want to stop execution and throw the error details, then you just need to call error(code, message),
For example:
❌ Old Way
if (!requiredValue) {
	throw error(500, 'You have made a boo boo')
}
✔️ New Way
if (!requiredValue) {
	error(500, 'You have made a boo boo')
}
No More Auto await in load Functions
With SvelteKit’s ability to stream promises from load functions to the client (which is awesome btw), version 1’s method of handling this was to automatically await fetching calls if the value was returned from the load function.
And if you wanted to pass the promise to the clients, you’d pass the function call, rather than the resolved value.
However, to remove some of the non-standard syntax, v2 requires you to await promises in load functions.
This is an example of how to await for fetched data in load functions now, vs how it was done before in v1:
❌ Old Way
export async function load(event) {
	const response = fetch(url)
	const result = response.json()

	return {result}
}
✔️ New Way
export async function load(event) {
	const response = await fetch(url)
	const result = response.json()

	return {result}
}
So, just chuck an await before you fetch things in load functions. Pretty standard.
Don’t goto other websites like that!
The goto function you use to programmatically navigate inside your .svelte files doesn’t accept external URL’s anymore, sorry!
Back to the golden days of Javascript, where you use window.location = url to navigate to a new page.
❗ Reminder: goto will still work with relative (your website’s) URL’s - this is just for going to other websites.
When they’ve got your app, who needs to go to other websites anyway 😤?
Resolve this 🍑
In v2, resolvePath becomes resolveRoute, with a nicer API which includes the generated base. The new resolveRoute now includes base, so you don’t need to import it to get the full path.
❌ Old Way
import { resolvePath } from '@sveltejs/kit';
import { base } from '$app/paths';

const path = base + resolvePath('/blog/[slug]', { slug: 'slug-name' });
✔️ New Way
import { resolveRoute } from '$app/paths';

const path = resolveRoute('/blog/[slug]', { slug: 'slug-name' });
Add a path to the cookies
When you Set-Cookie without setting a path, the browser sets it for only the parent of where it’s being called. If you’ve set cookies like this before expecting the cookies to apply to the entire domain, you’ve probably had a bad time trying to get to the bottom of it.
That’s why Sveltekit 2 now requires you include a path parameter on the the following cookies methods:
cookies.set(...)cookies.serialize(...), andcookies.delete(...)
❌ Old Way
cookies.set(name, value);✔️ New Way
cookies.set(name, value, { path: '/' });To apply the cookies to the domain, you will set path: '/', but at least now the compiler will yell at you if you forget to set it.
A+ for damage control v2!
What’s NOT In SvelteKit 2?
Didn’t see a feature you hoped for on the list?
Remember, this was not an exhaustive list of the the new features and changes brought in SvelteKit 2. There’s a bunch of security updates and tech-debt that has changed under the hood also, e.g. moving to Vite 5.
There are still a bunch of features that weren’t included in the release that many Svelte enthusiasts were hopefully for.
The main features I’ve seen people looking forward to with SvelteKit is:
- websockets, and
- named slots in layouts
…which neither made into the v2 release.
I’ve been working on some websocket-heavy apps recently and would love to see them included natively into SvelteKit. I’m certainly not alone with this specific desire, however an official websockets integration was not included in the v2 changelog.
Whatever it is that you’d like to see part of SvelteKit, I encourage you to get active in discussions. This can be as simple as going through the SvelteKit issues page on GitHub and thumbs-uping 👍 changes you’d like to see. Or even making pull requests if you have the chops for it!
Minor Releases are Not Always Minor
It’s worth mentioning how regularly the Svelte team are pushing meaningful updates to Sveltekit, outside of the ‘major’ releases.
For example, the sveltejs/enhanced-img experimental package was released on the 12th November 2023 - outside of the main SvelteKit 2 announcement. The package was a big leap in closing the gap in the framework wars, and to better better deliver on the SvelteKit mission.
The enchanced-img package was a way to serve reformatted, resized and optimized images for webpages, akin to the next/image package in NextJS.
If something you are hoping for didn’t get released in SvelteKit v2 and it has wide support in the forums, there’s every chance it’s in the short-term roadmap. You might not have to wait for the SvelteKit v3 release in December 2024 (speculation given that v2 was released on the 1 year anniversary of v1😋).
Migrating to v2
For the best and most comprehensive tutorial on how to migrate to v2, follow the Migration Guide for SvelteKit v2 for step-by-step instructions.
Thankfully the Svelte team have put together a migration tool for updating or highlighting all instances in your app where there are breaking API changes.
A few caveats you should know before migrating to SvelteKit 2:
- SvelteKit 2 requires Svelte v4, so before migrating to Sveltekit 2, make sure your app is using Svelte 4. If you need to migrate to Svelte 4, follow this migration guide.
- It’s recommended that you update your SvelteKit version to the latest SvelteKit 1 version before migrating to SvelteKit 2. This will ensure the deprecations get highlighted.
- Sveltekit 2 requires Node 18.13, or higher.
Once you ensure your app and environment is compliant with the above 3 pre-requisites, run npx svelte-migrate@latest sveltekit-2 in your terminal and the tool will make some of the changes automatically.
Conclusion
This was a cool surprise, and I’m excited to implement some of the shallow-routing features into my apps.
With the release Svelte 5 around the corner, we can expect to see lots of changes and new faces joining the Svelte force. It’s exciting times being on this side of the fence! 💪
The removal of the throw keyword for redirects and errors is a simple syntax upgrade, and I’m also thankful for some of the compiler strictness changes.
Overall, this is a step in the right direction for SvelteKit, and the core team absolutely rocks for gifting this to us. We really are unworthy 🙏